Hello! I’m back! Maybe it looked like I’d given up on blogging but I promise I haven’t! Now I can’t wait to get caught up on all those projects that haven’t been blogged (going back to November last year!!). First up I have a pillow that I made for Alison and Sami’s Instagram pillow swap a while back…
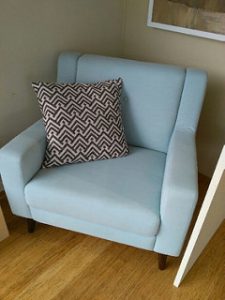
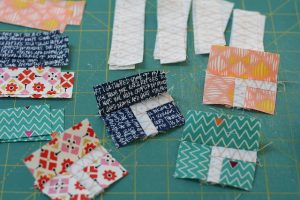
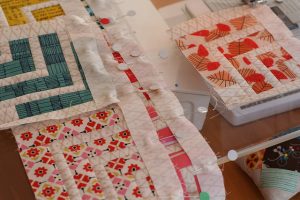
No, not that one! I spotted this pillow in a shop window in Auckland over the summer holidays, I thought it would be fun to recreate something like it for my partner in the swap. I really wanted to replicate the way the “blocks” interlock but I still haven’t figured out how to do that. I played around with scale before deciding that the blocks needed to be small, not as small as the ones in my inspiration pillow though, that would be crazy. Even so, my narrow strips ended up being 3/8″ wide (finished). I think that’s as small as I could go without resorting to foundation paper piecing, much as I love paper piecing, I prefer not to if I can help it!
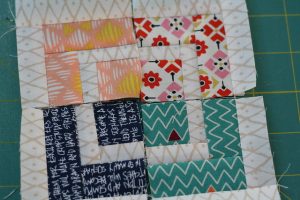
The background fabric is from Katarina Roccella’s Wonderland collection, Diamond Flush in Gold. The squares on my cutting board are 1cm not 1″, these blocks are tiny!
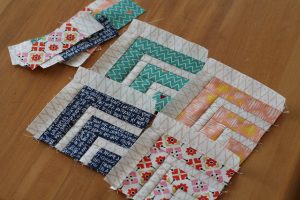
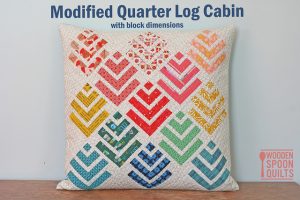
Here’s my finished pillow. It really needs a better name… maybe “Summer Cabin”…
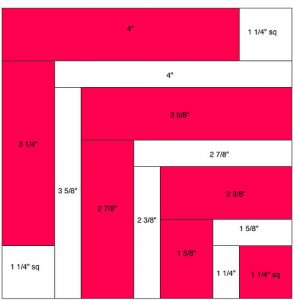
I had two people ask for block dimensions (yay, thank you both!! ;b) and here they are… for a 4 1/4″ finished block…
For each “Summer Cabin” block you will need;
Background fabric;
- one 7/8″ x 15 3/4″ strip, cross cut into the dimensions in the diagram above. (I suggest cutting your strips a little longer, say 17″, so that you have some wriggle room, or am I the only one who runs out of fabric for the last cut?)
- two 1 1/4″ squares
Main fabric:
-
one 1 1/4″ x 19″ strip, cross cut into the dimensions in the diagram above. (As above, I suggest cutting your strips a little longer, say 20″, so that you have some wriggle room.)
To piece the block;
To make a 20″ pillow
-
you’ll need 13 blocks
-
my sashing strips are cut 7/8″ wide
-
for the side setting triangles cut five 5 1/8″ squares in half on the diagonal
-
for the corner setting triangles cut one 5 1/2″ square in quarters on the diagonals
-
if you use only one background fabric like I did, you’ll need 1/2-3/4 yard. Cut the setting triangles first as they’re the largest cuts
-
the pillow finishes at 20″ square
-
mine is quilted using my walking foot and a serpentine stitch
-
my favourite technique for adding a zipper is Svetlana’s zipper closure tutorial. Svetlana’s tutorial is for a 16″ pillow. For a 20″ pillow, I cut 12″x21″ and 15″x21″ pieces for the pillow back (this allows for wriggle room!!)
-
feel free to play with block layout, orientation, colours…

9 thoughts to “A pillow and a tutorial”
Welcome back Rachel, I missed your inpsiring posts and small blocks. You nailed it again! I love your Summer cabins!!
Looks fab! Great cushion!
Beautiful! Thank you for this pattern! It would be lovely to make 🙂
Summer cabins sounds perfect – though summer bach is probably more apt for us kiwis.
I really like the looks of this pillow, design and fabrics you chose. I like the name summer cabin as well!
Nice!
Hi! Thank you so much for this tutorial! I'm working on my own pillow and have a few questions. Why do you need five 5 1/8 squares? I only count 8 side setting triangles In addition to the corners. Also, do you add sashing strips to all 4 sides to every block or only between blocks? Thank you!
I have just found your blog, and LOVE the cushion you made with the quarter log cabin design. Thank you for the tutorial!
Hi, I have just finished this pillow, made in neutral and gray tones. Thanks for the tutorial. I wanted to upload a photo but I have not found the option.