
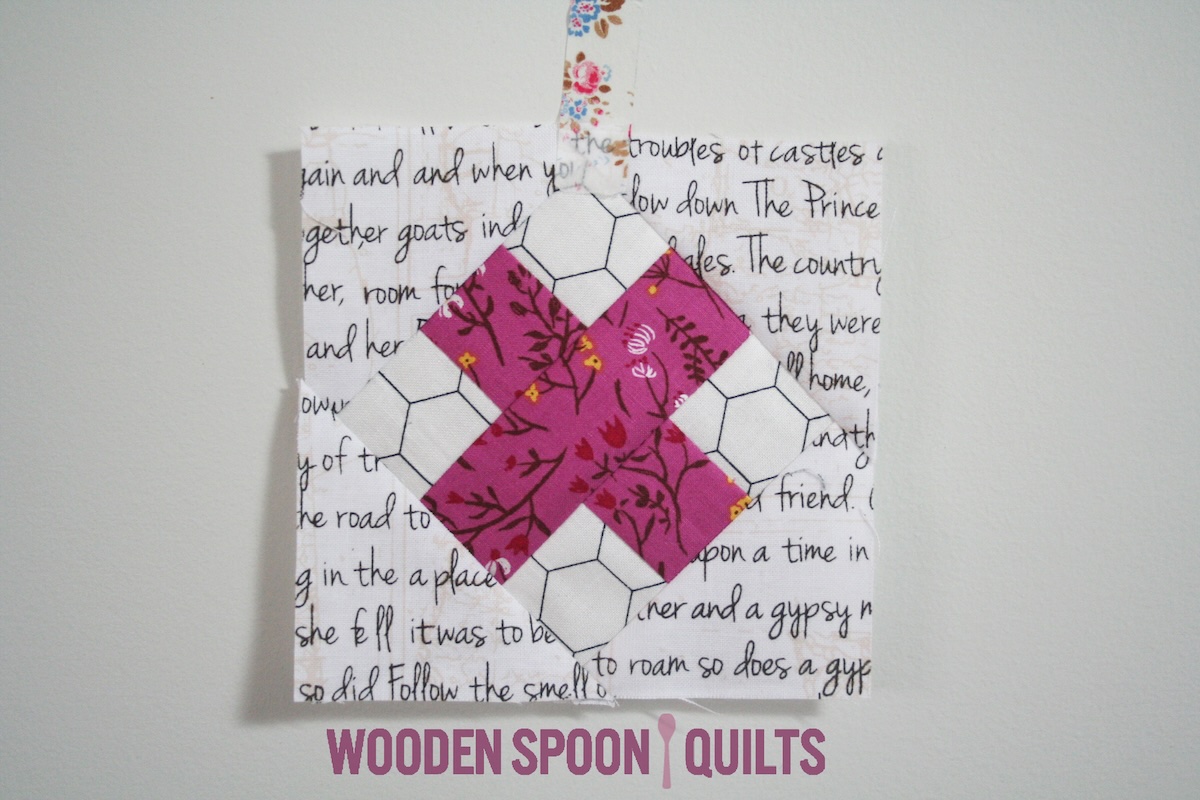
I’m not sure if this block has an official name, I’m calling it Raspberry Kiss. Below are the instructions for making one 4 1/4″ finished square.
Making a pillow
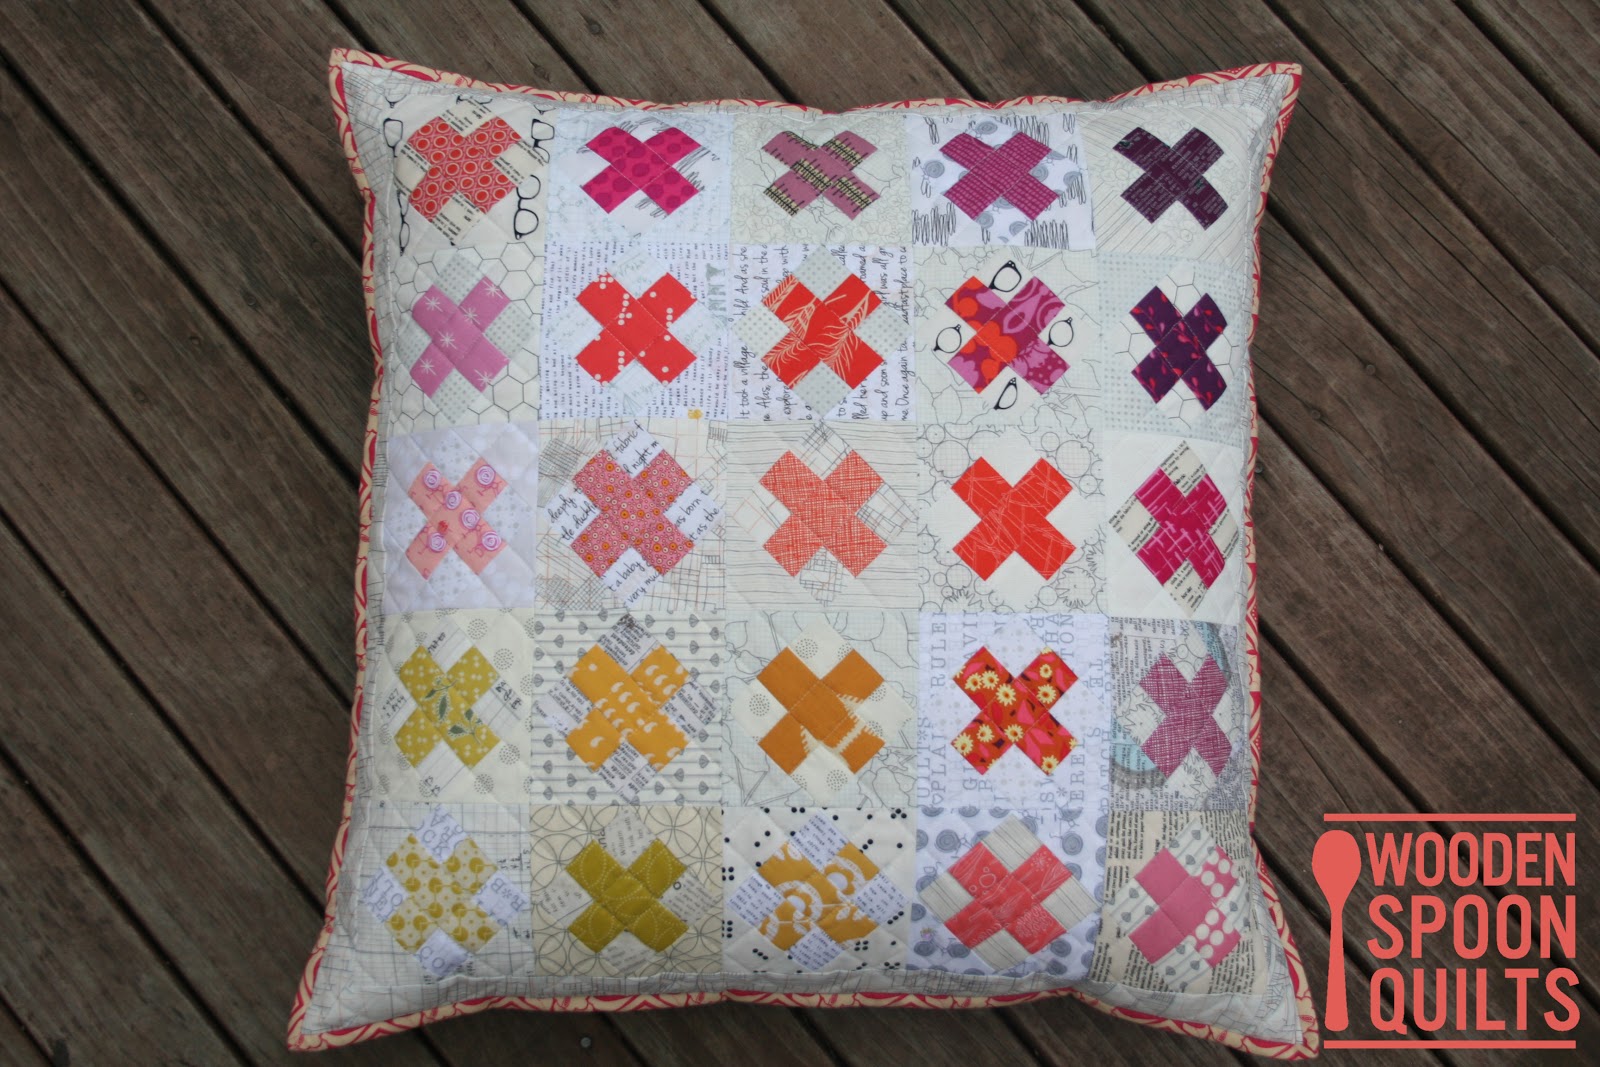
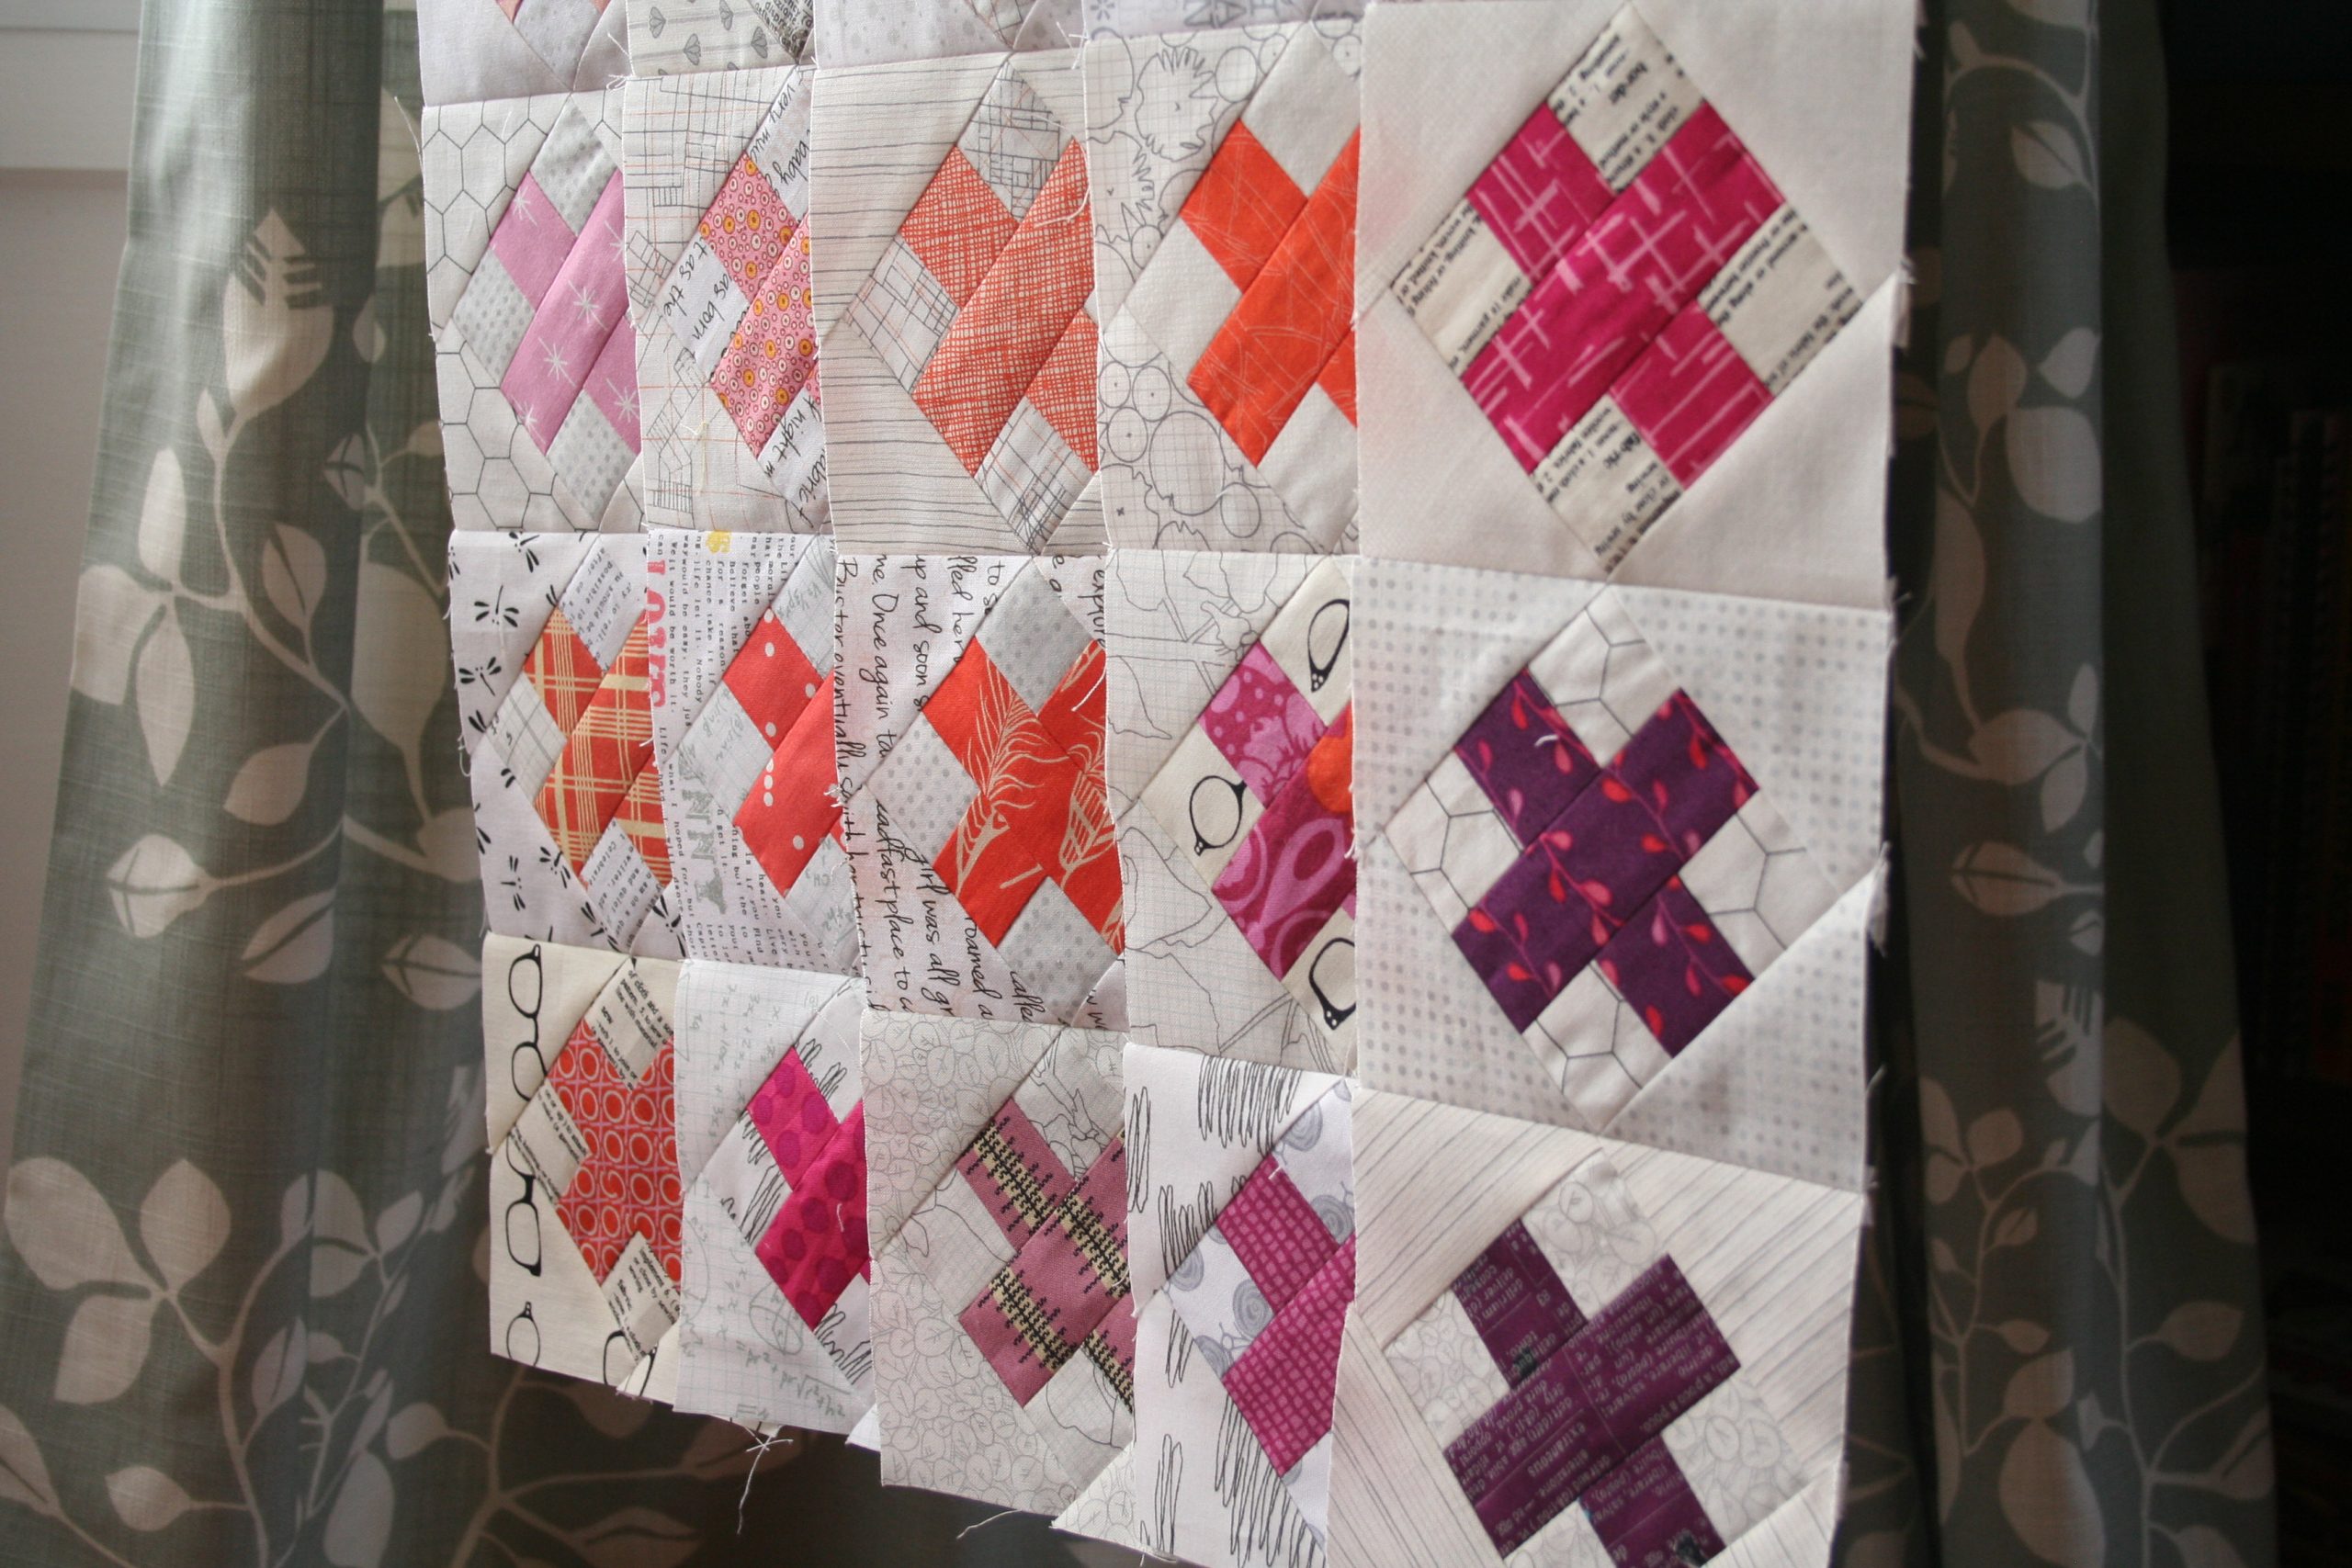
If you’d like to make a 20″ pillow then make 16 of these squares (4 rows of 4) and add a 2″ border on all sides. My Aerial Kisses Pillow finished at 24″, I used 25 of these blocks (5 rows of 5) and added a 2″ border on all sides.
Resizing this block
If you’d like to resize this block, see cutting dimensions for an 8 1/2″ block and my resizing tips, at the end of this tutorial.
Directions for Making a 4 1/4″ finished block
Fabric cutting
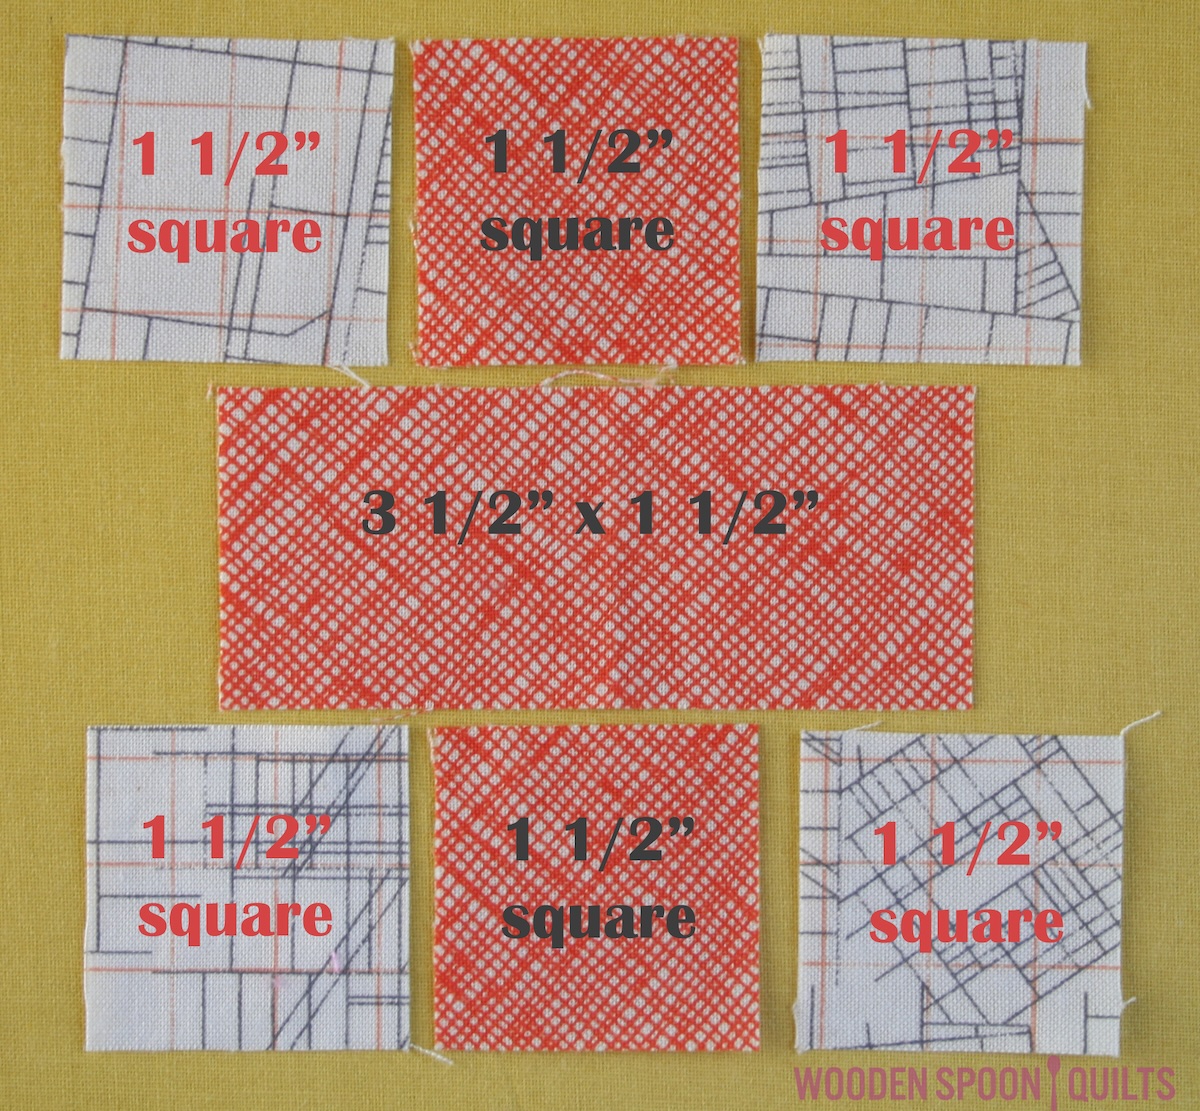
Centre cross block cut ~
4 – 1 1/2″ background fabric squares
2 – 1 1/2″ cross fabric squares
1 – 3 1/2″x 1 1/2″ cross fabric rectangle
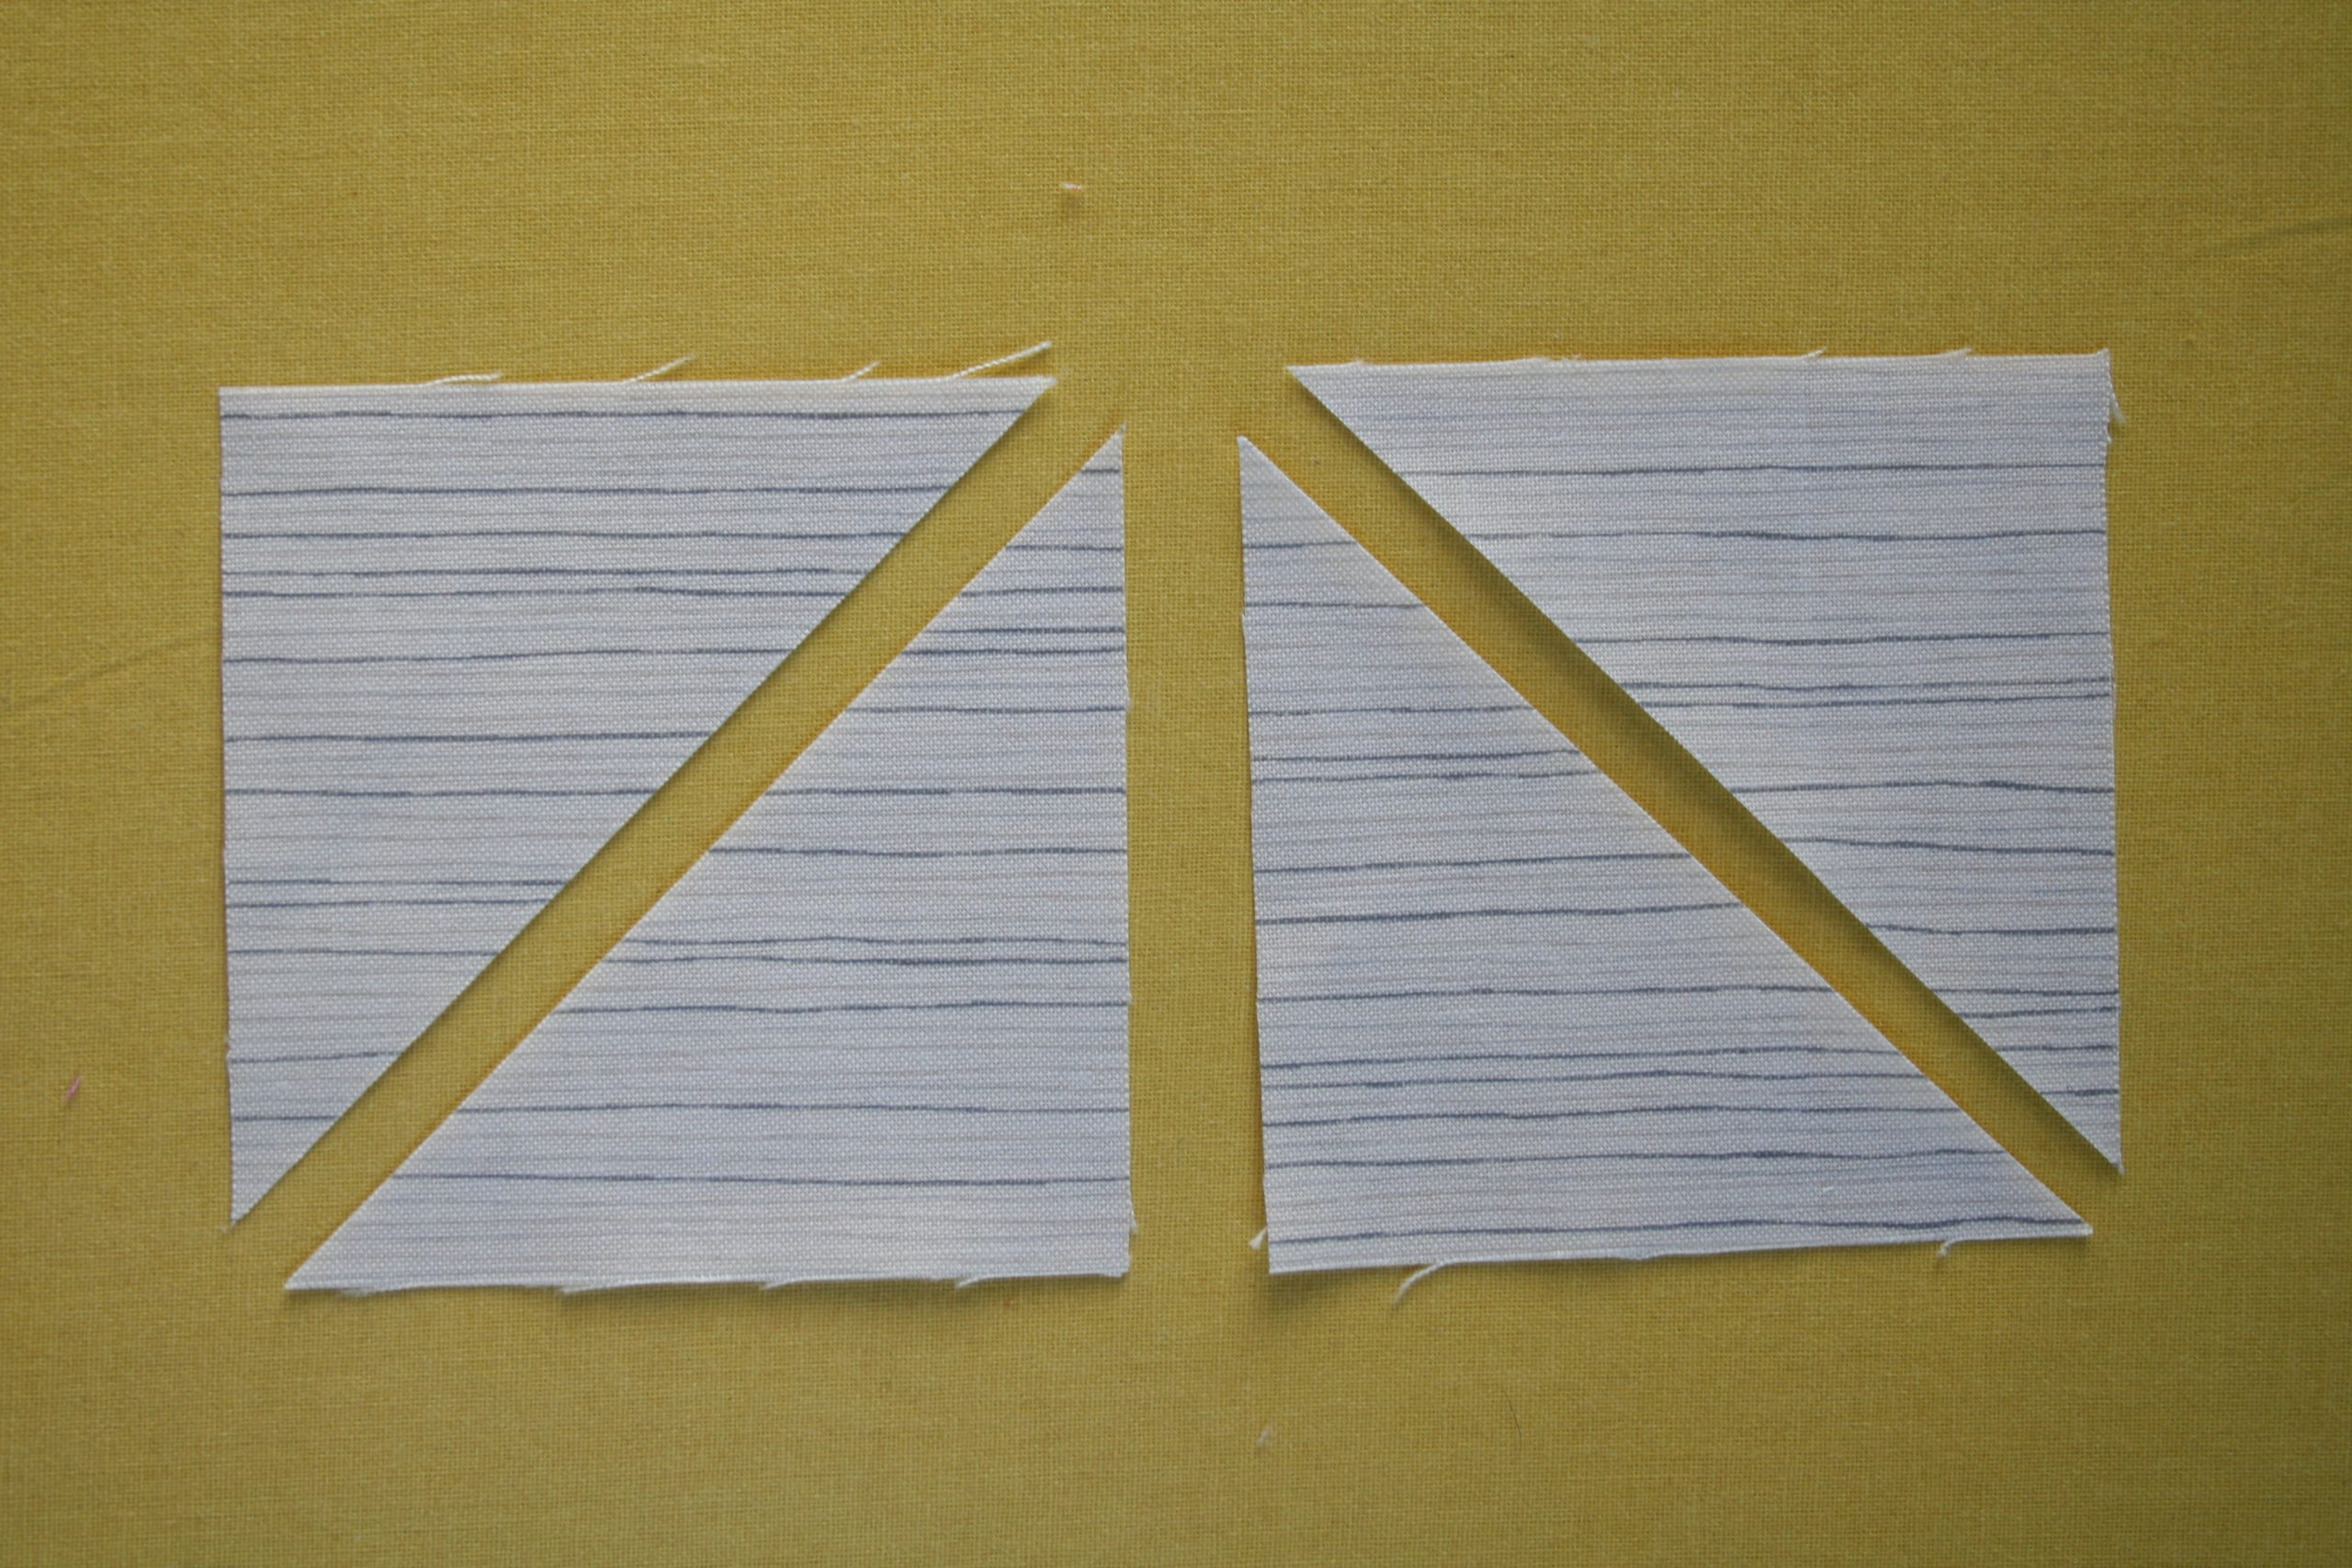
Corner triangles cut ~
2 – 3″ squares
Then cut each square in half diagonally to yield 4 triangles. If you’re using a directional fabric, as I have here, make sure to cut the squares in opposite directions as I’ve done below (that is, if you’d like the fabric to go in a uniform direction).
Directions for block assembly
Use a 1/4″ seam allowance throughout.
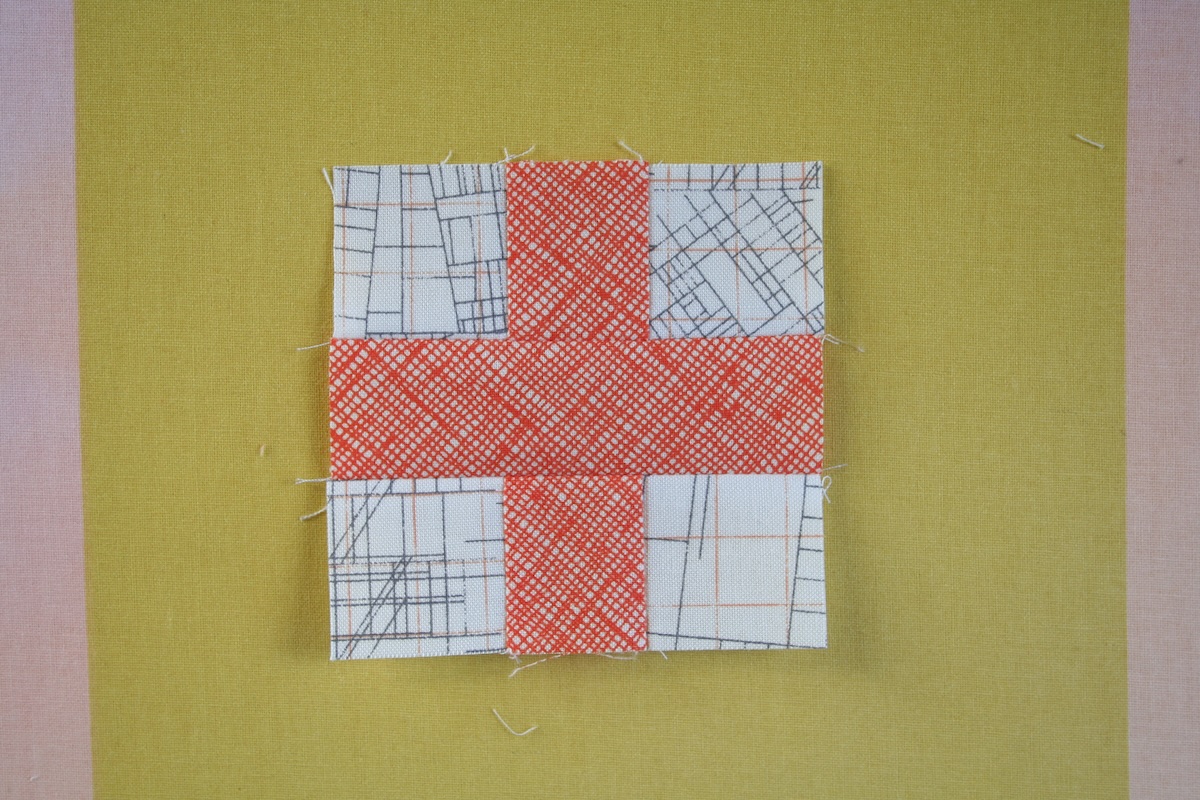
Sew the centre cross block together.
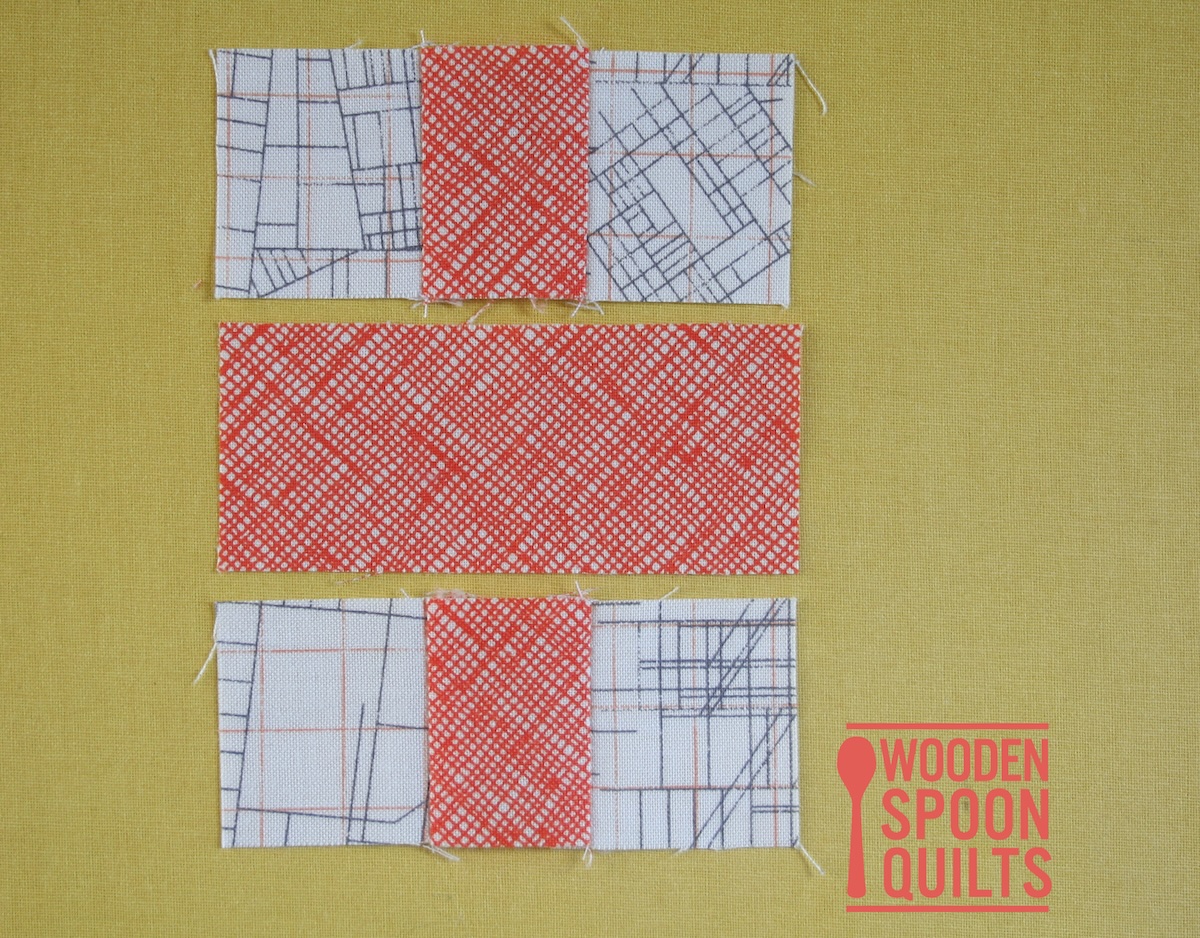
The centre cross block should measure 3 1/2″ square at this point.
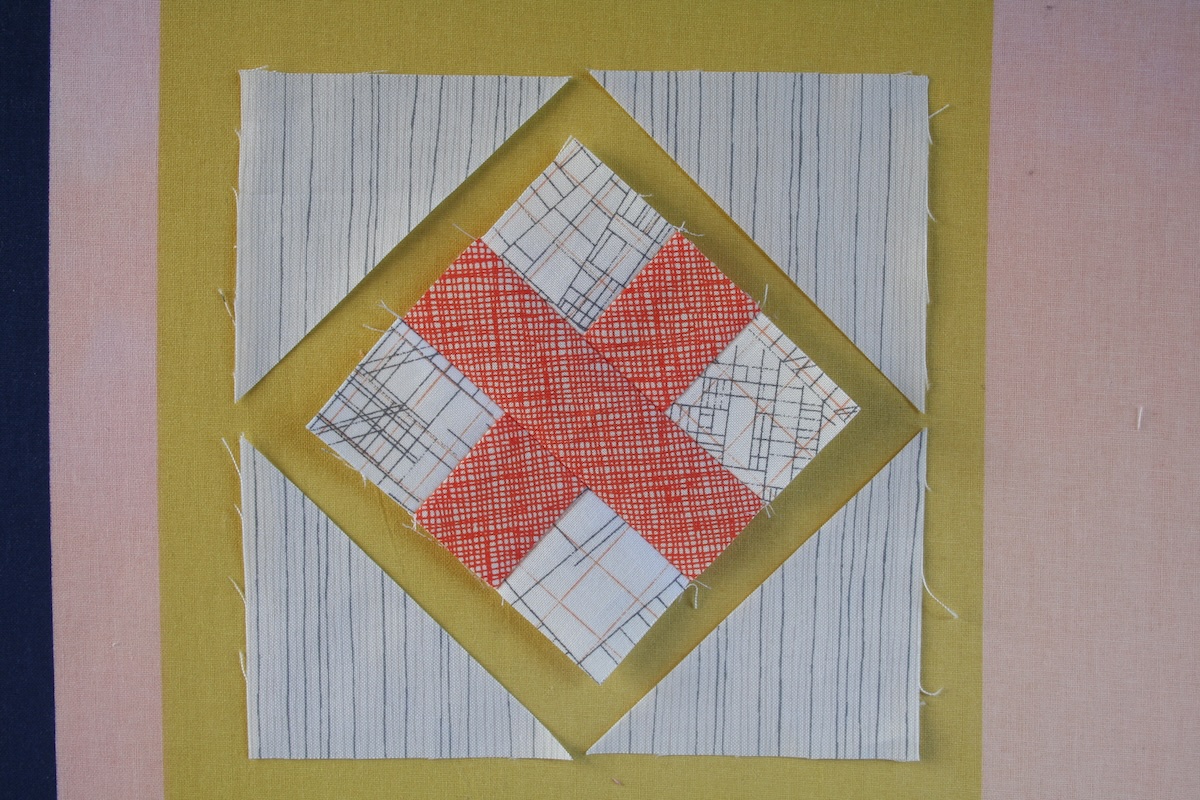
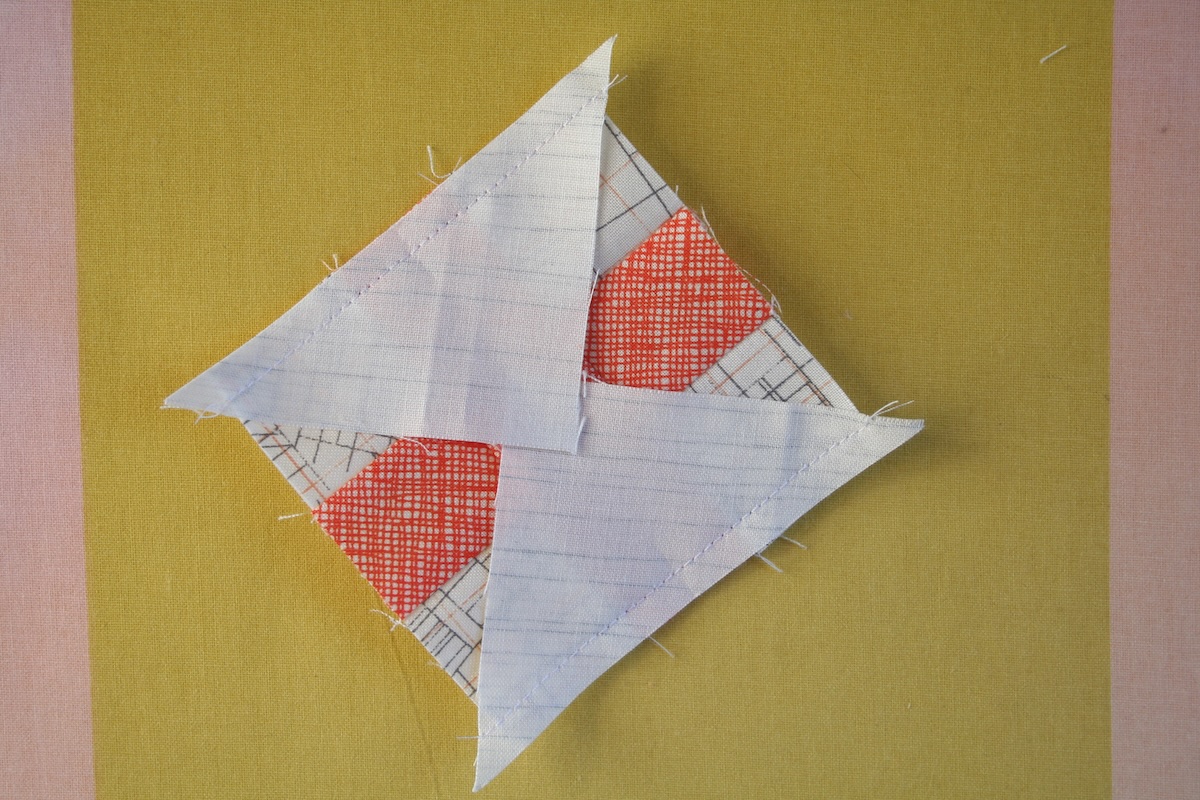
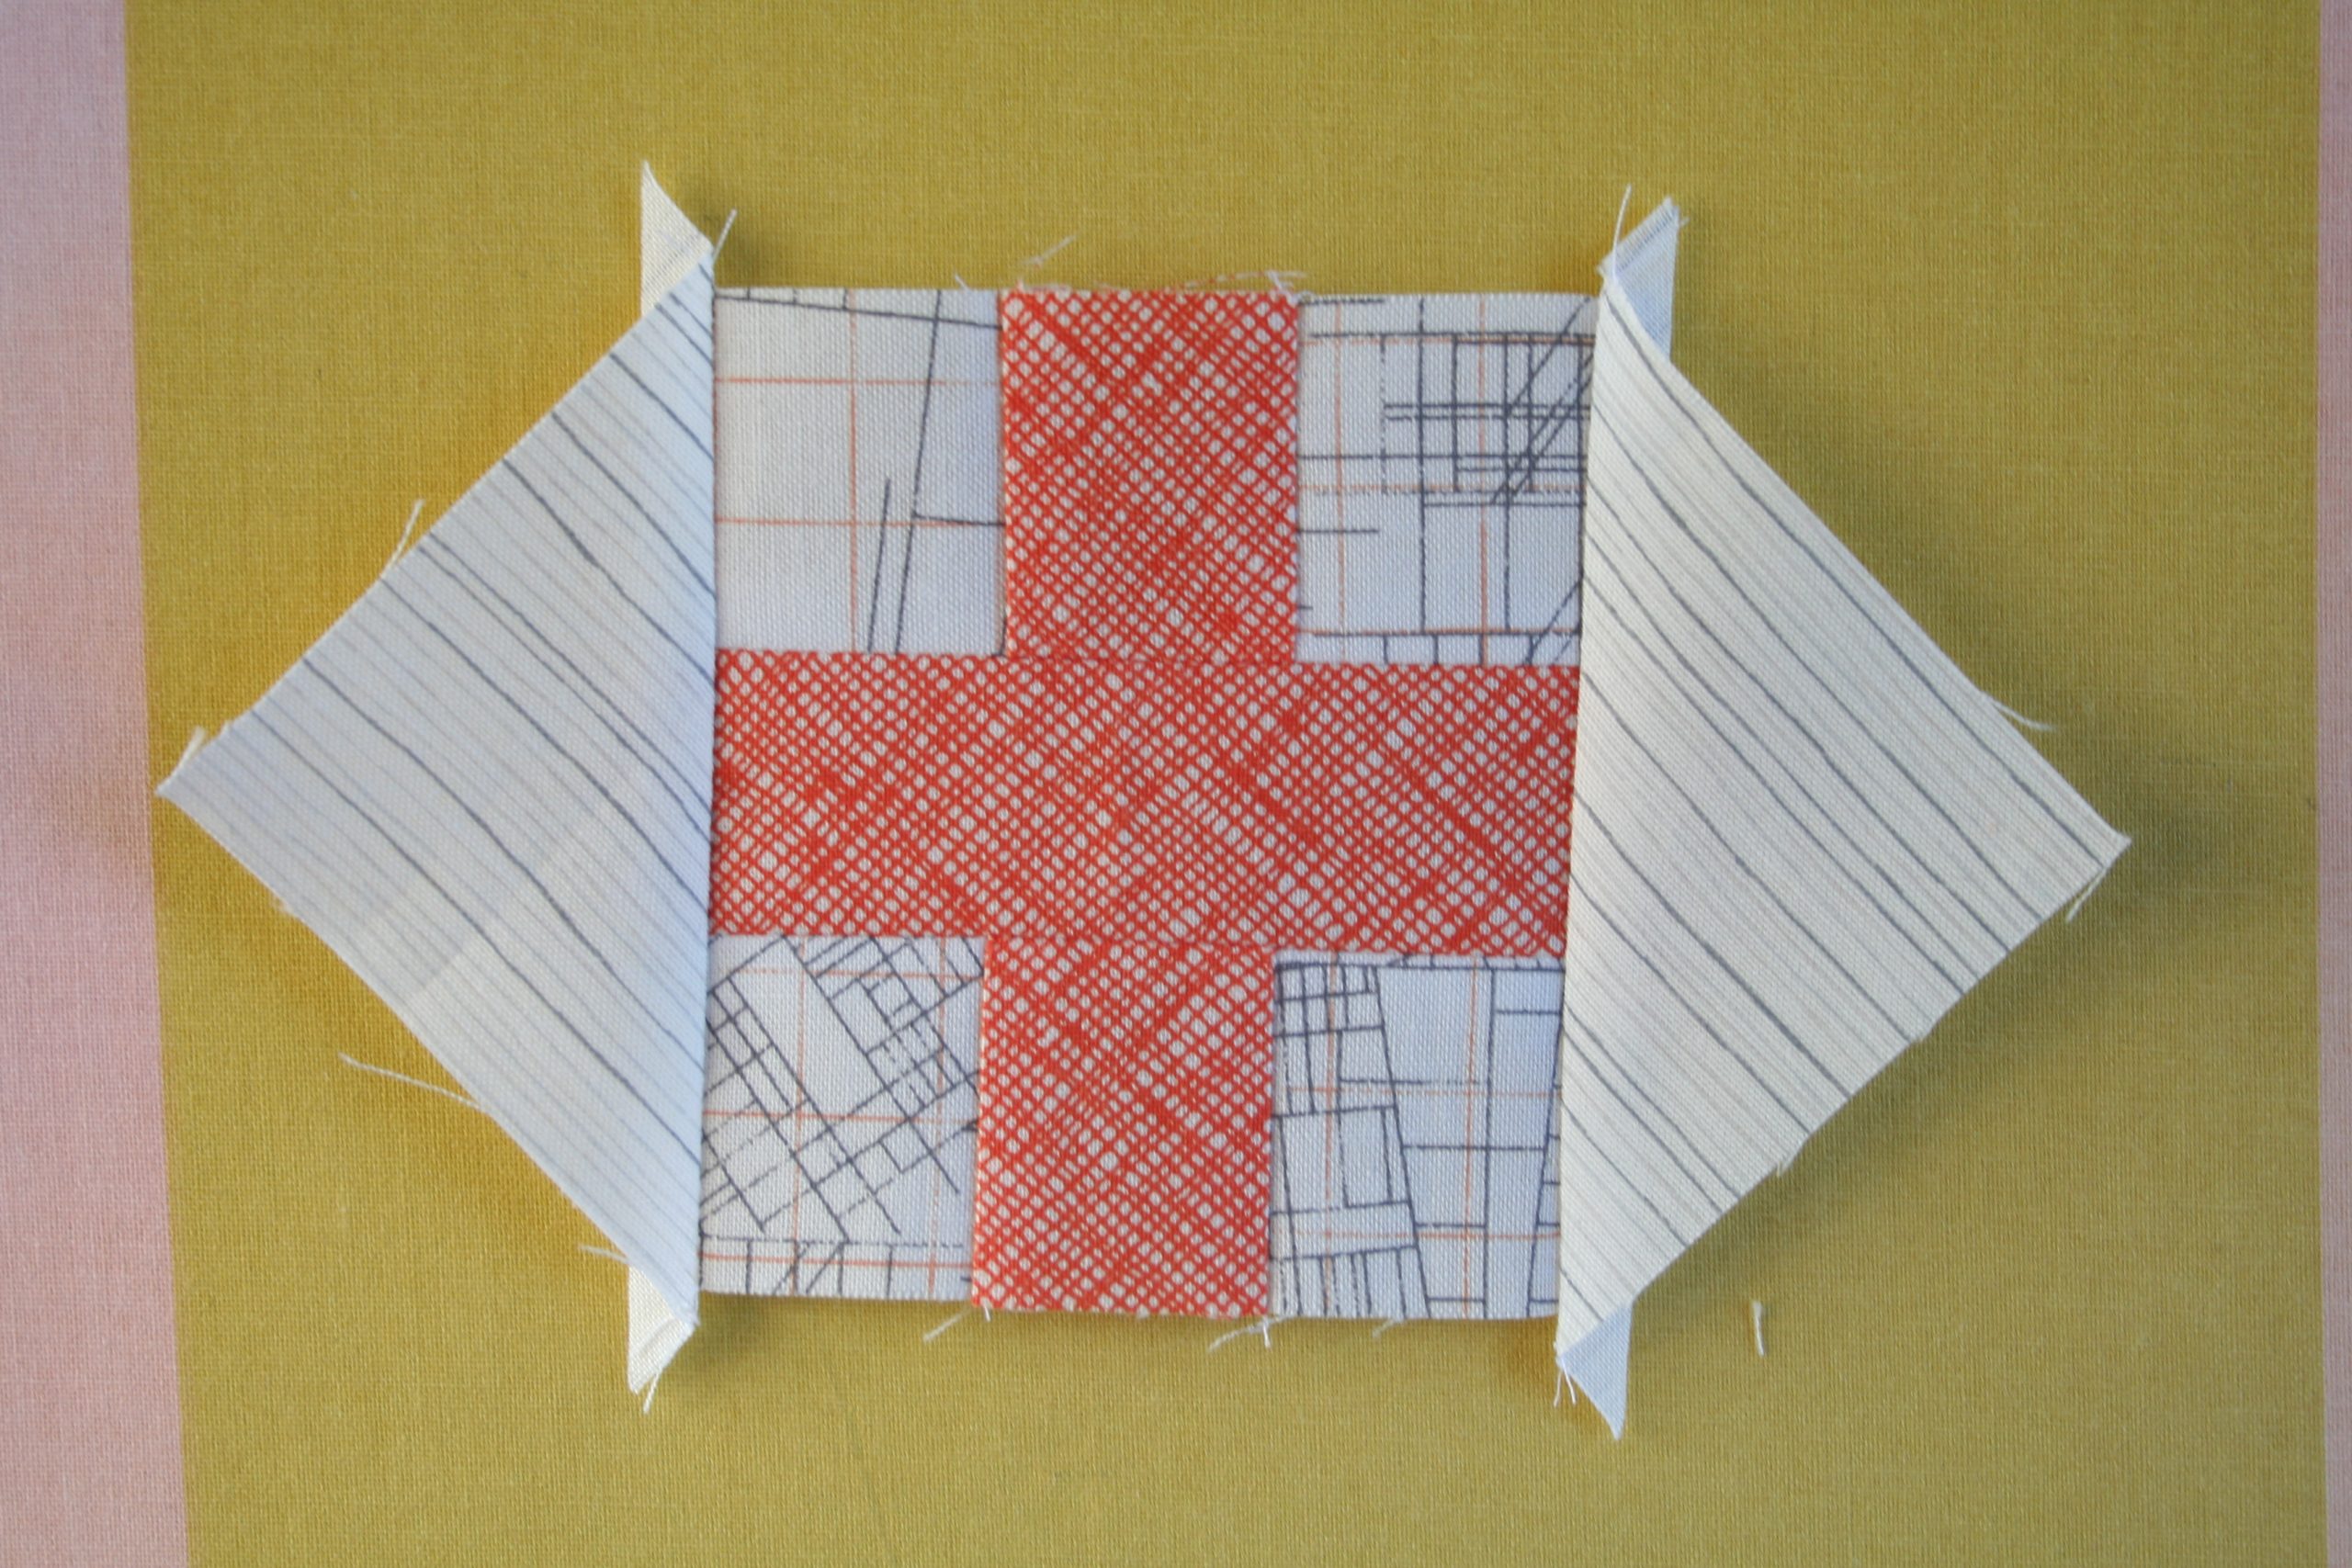
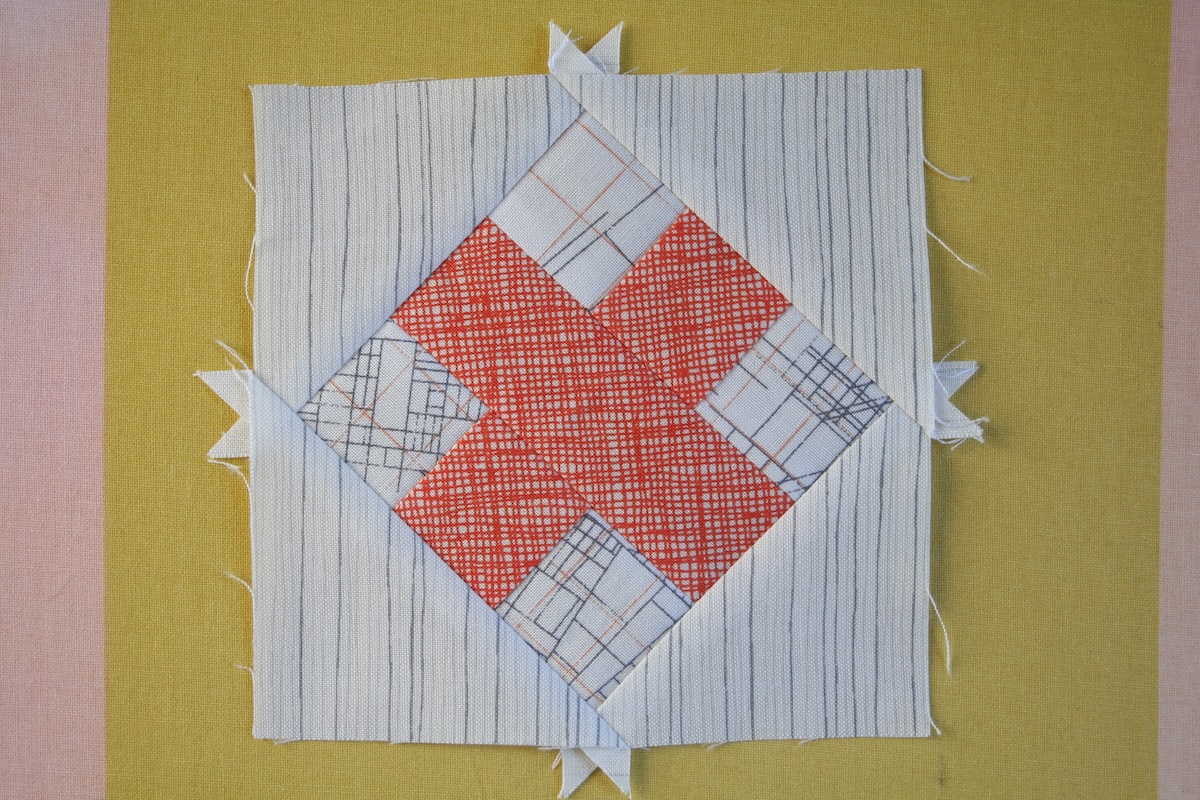
Add the corner triangles.
I like to lay them out before sewing them together.
The triangles need to be centred on each side. To line the triangles up accurately, I fold both the triangle and the centre block in half and finger press a crease at the centre. I like to fold each piece in opposite directions so that when lined up, they nestle inside each other. Here I’ve folded the centre cross block with right sides together…
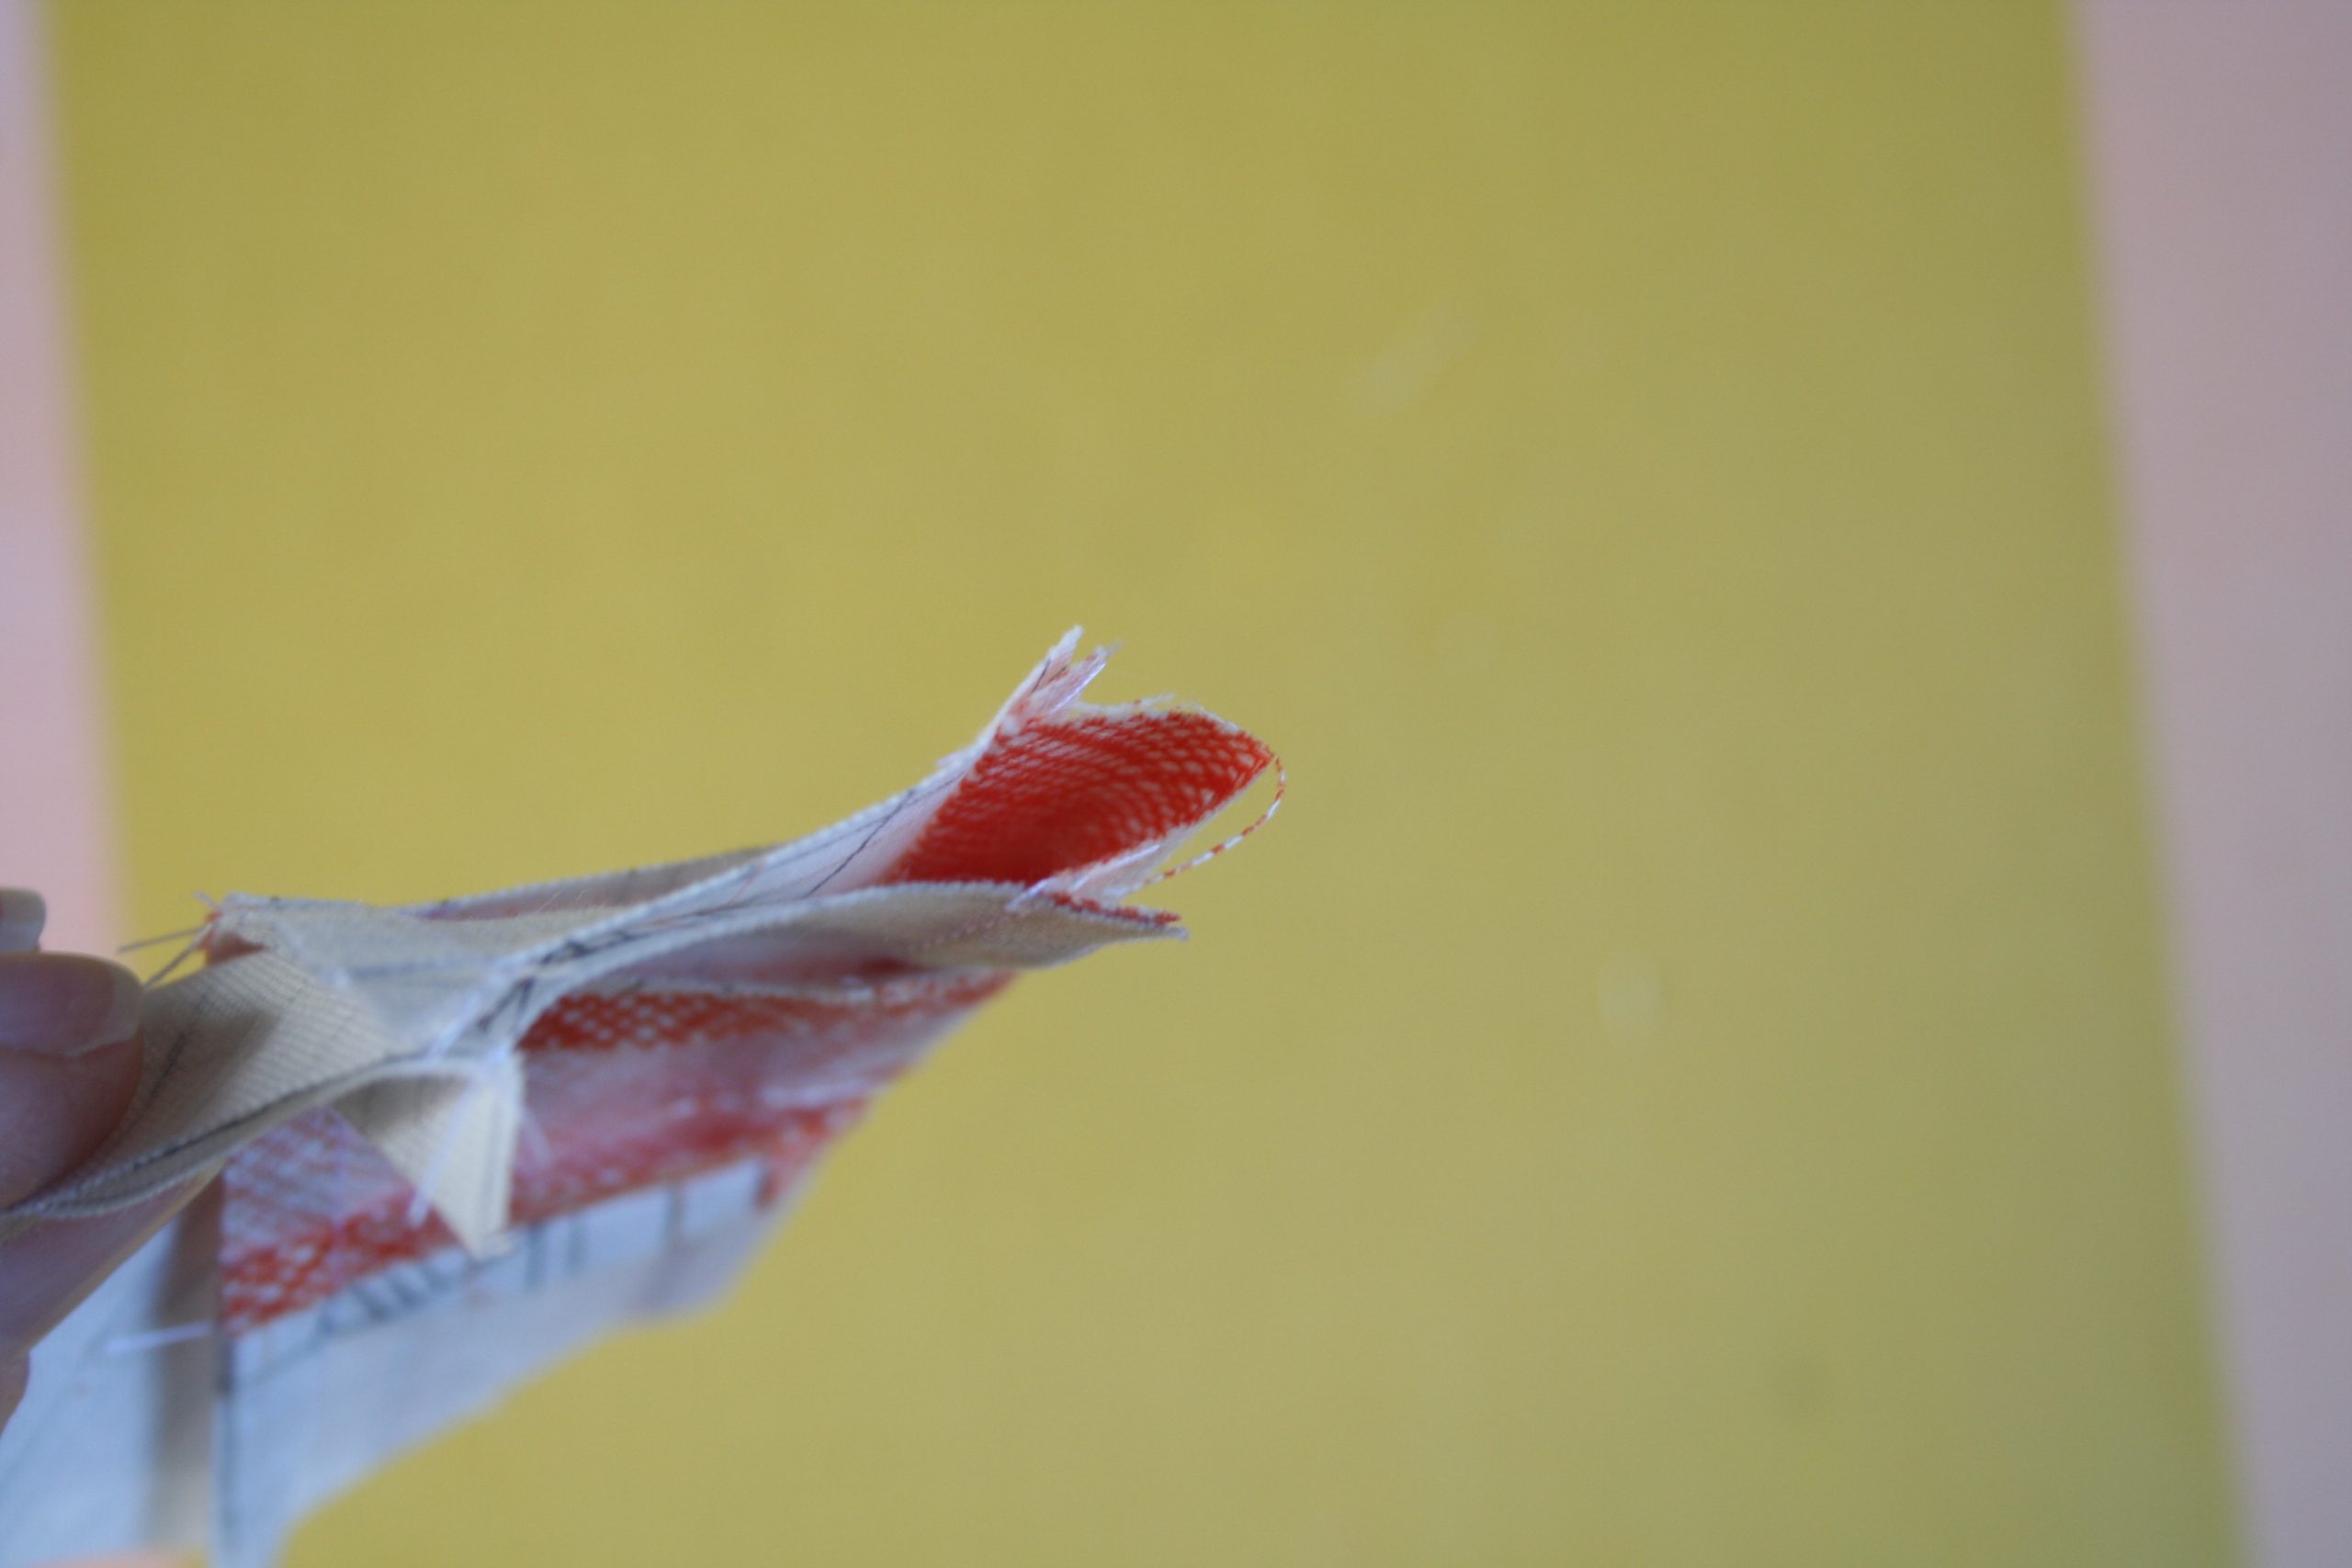
and the triangle with wrong sides together.

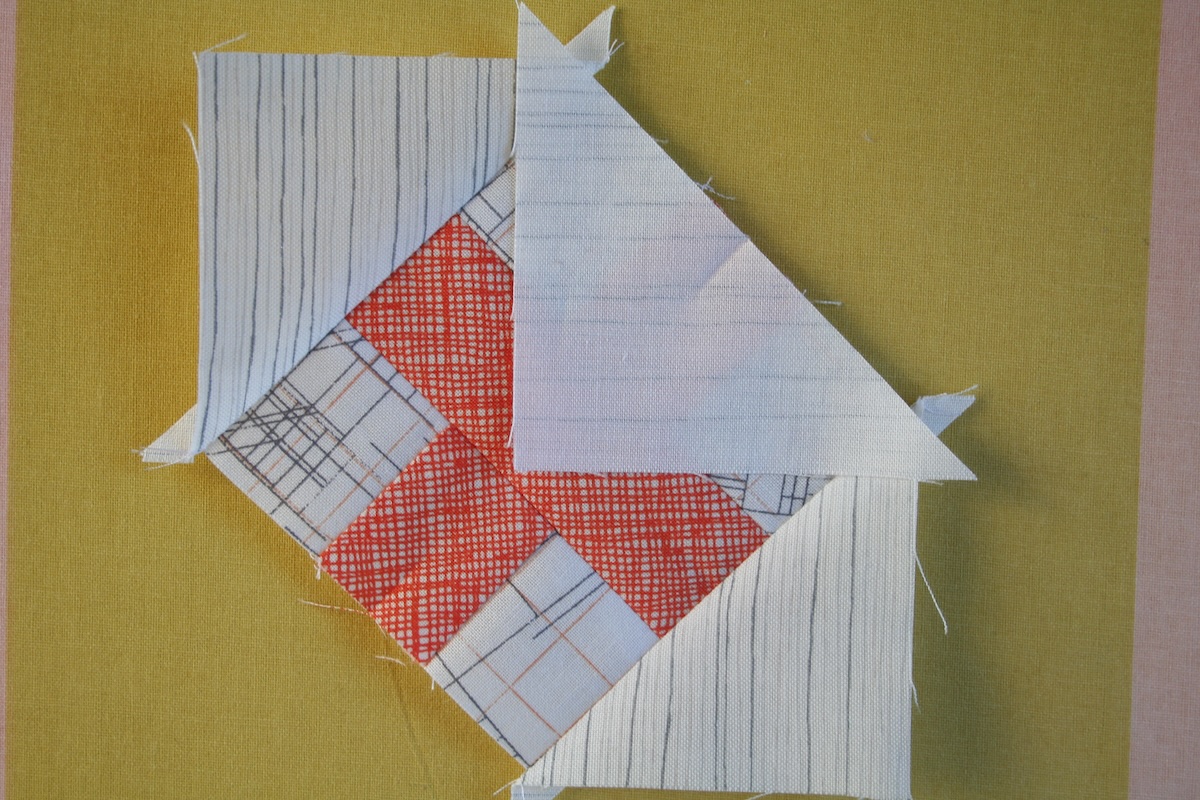
Nestle the fold in the triangle into the fold in the cross block as shown here and sew.
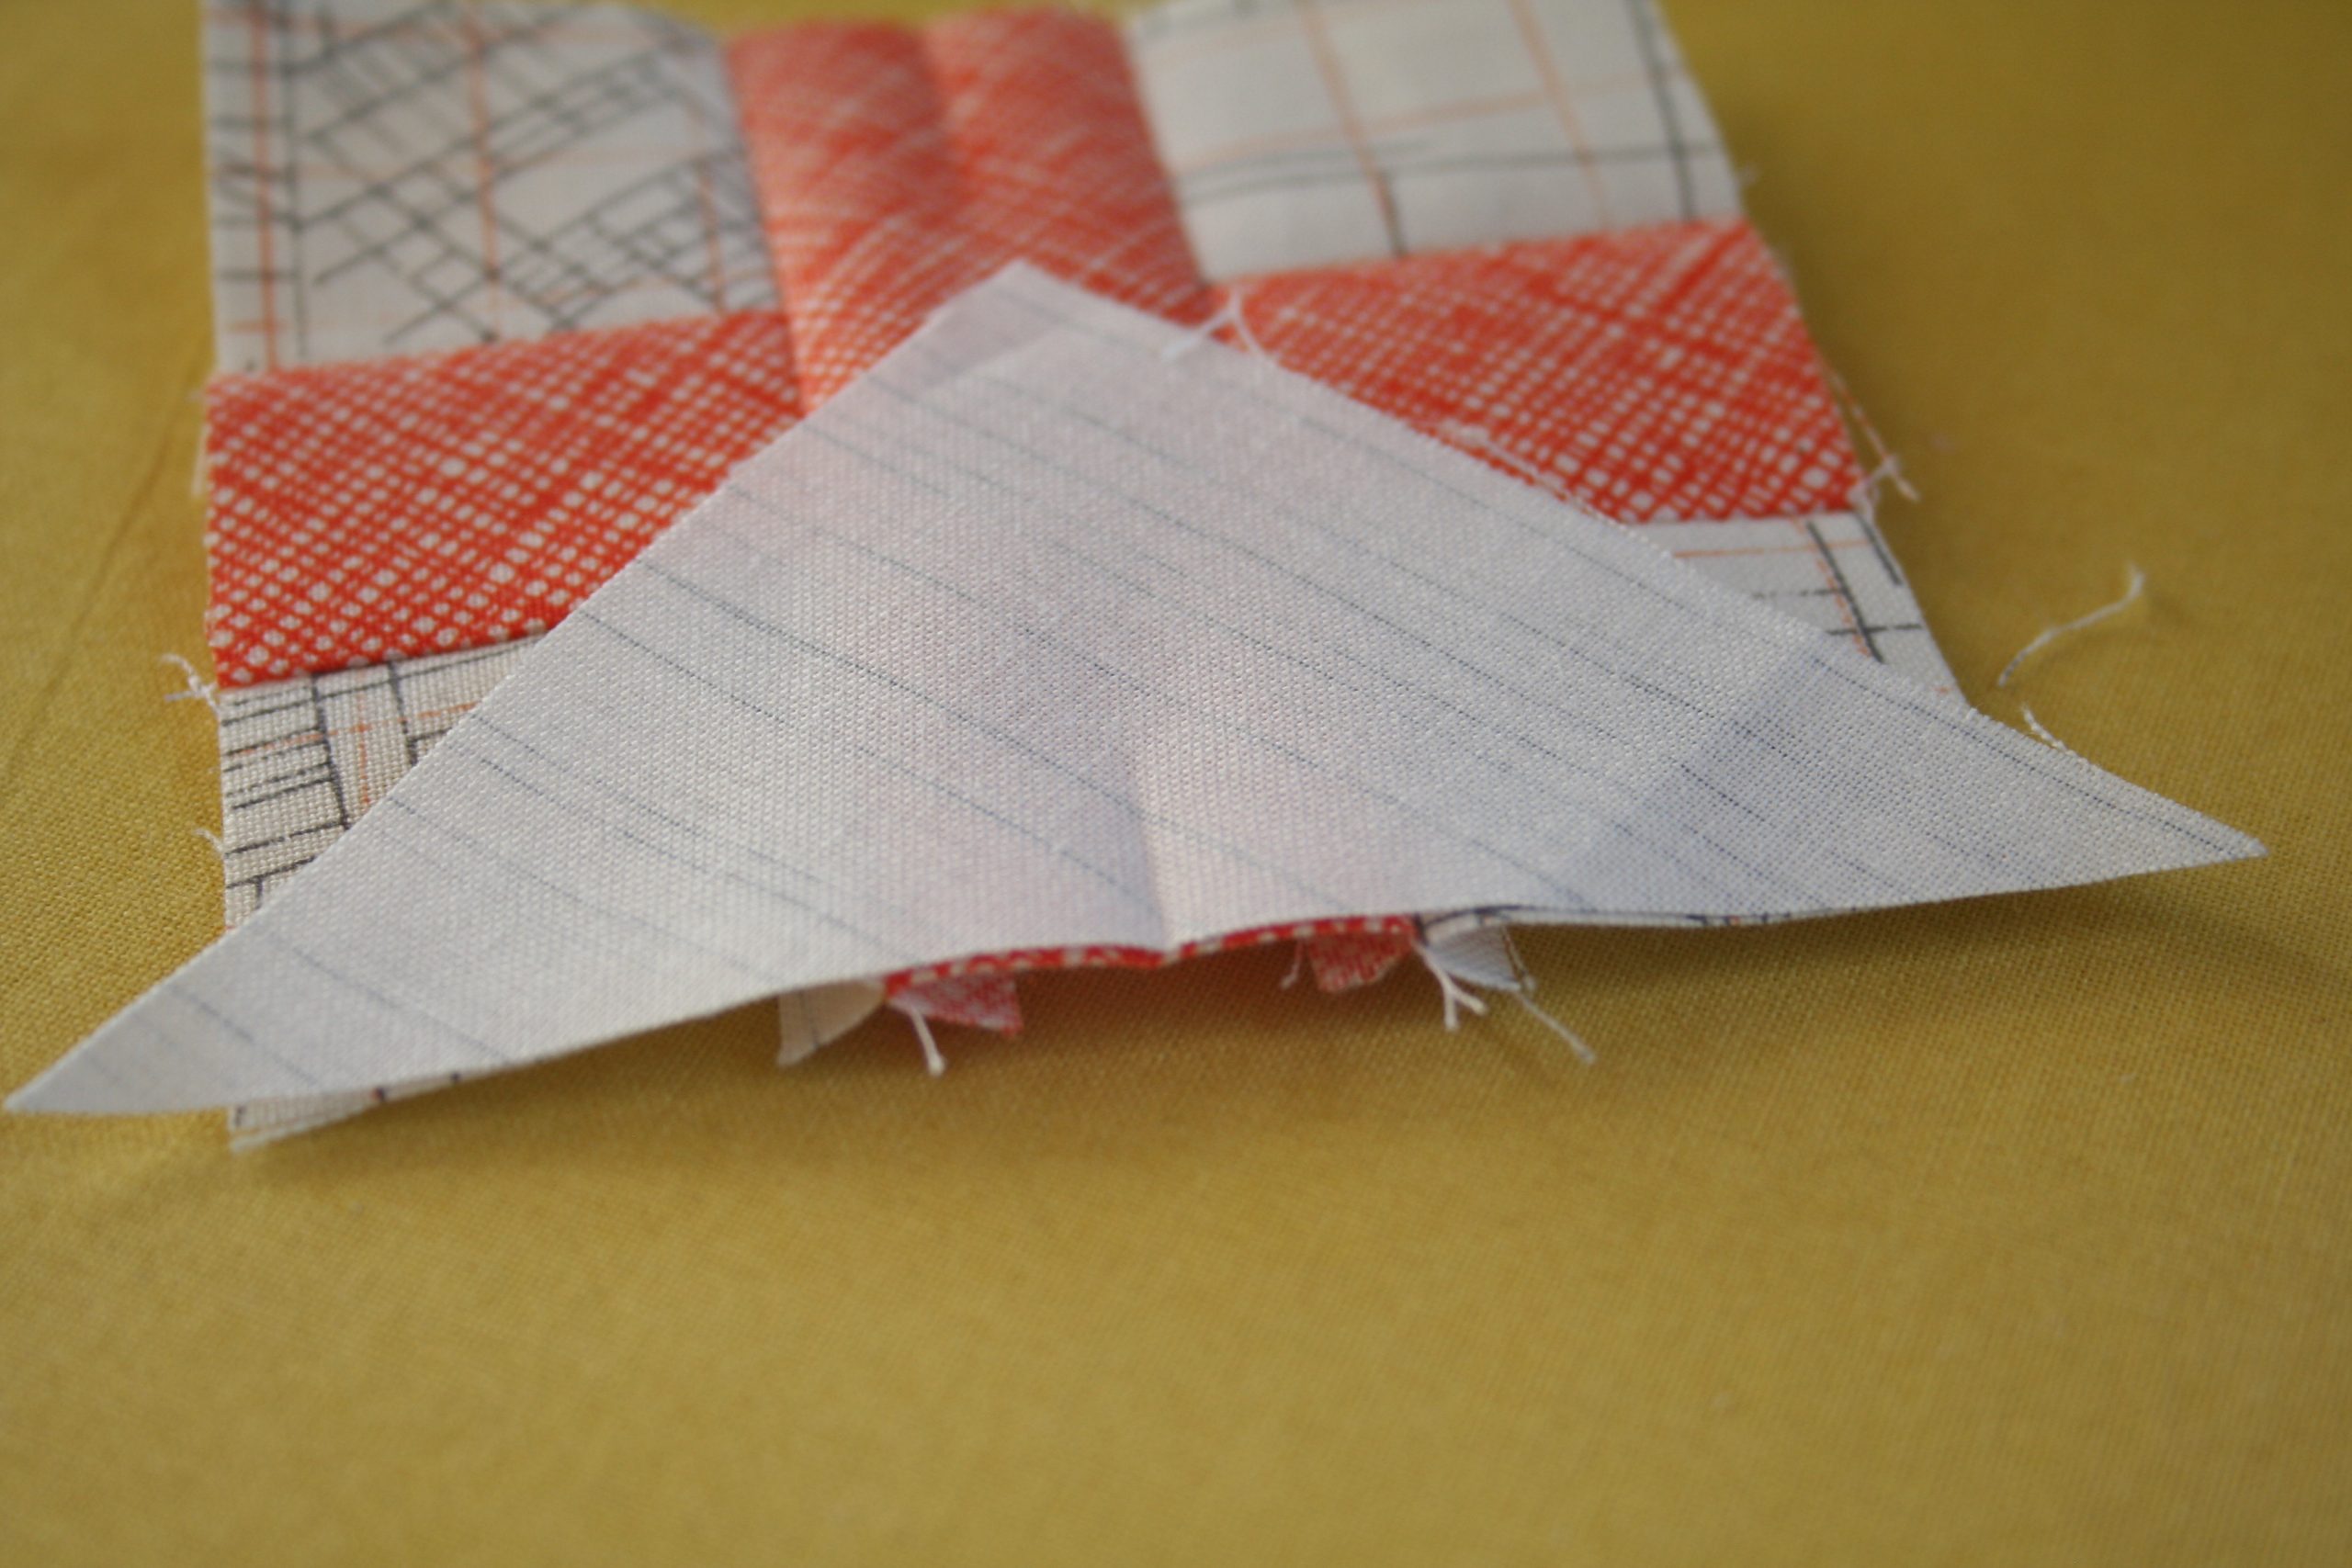
Repeat the process on the opposite side so that you now have two triangles attached to your cross block.
Press your block.
Repeat the process with the two remaining triangles.
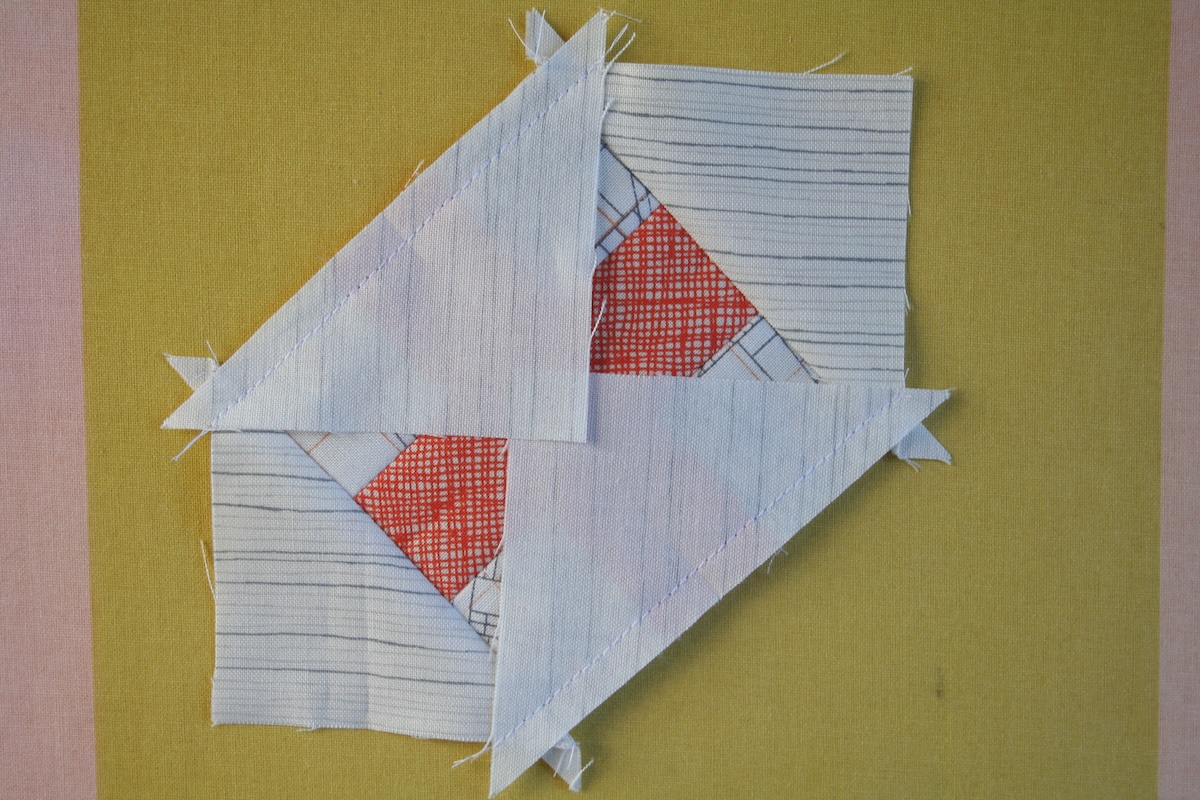
Press your block.
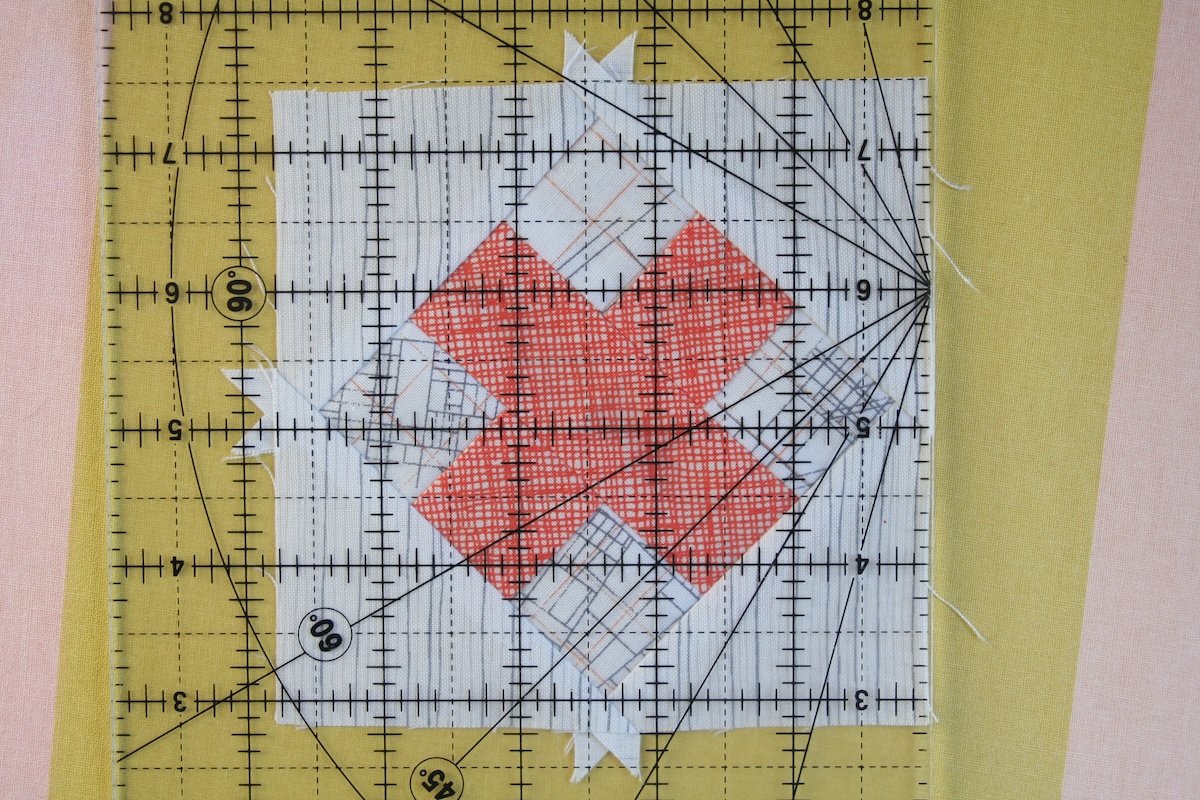
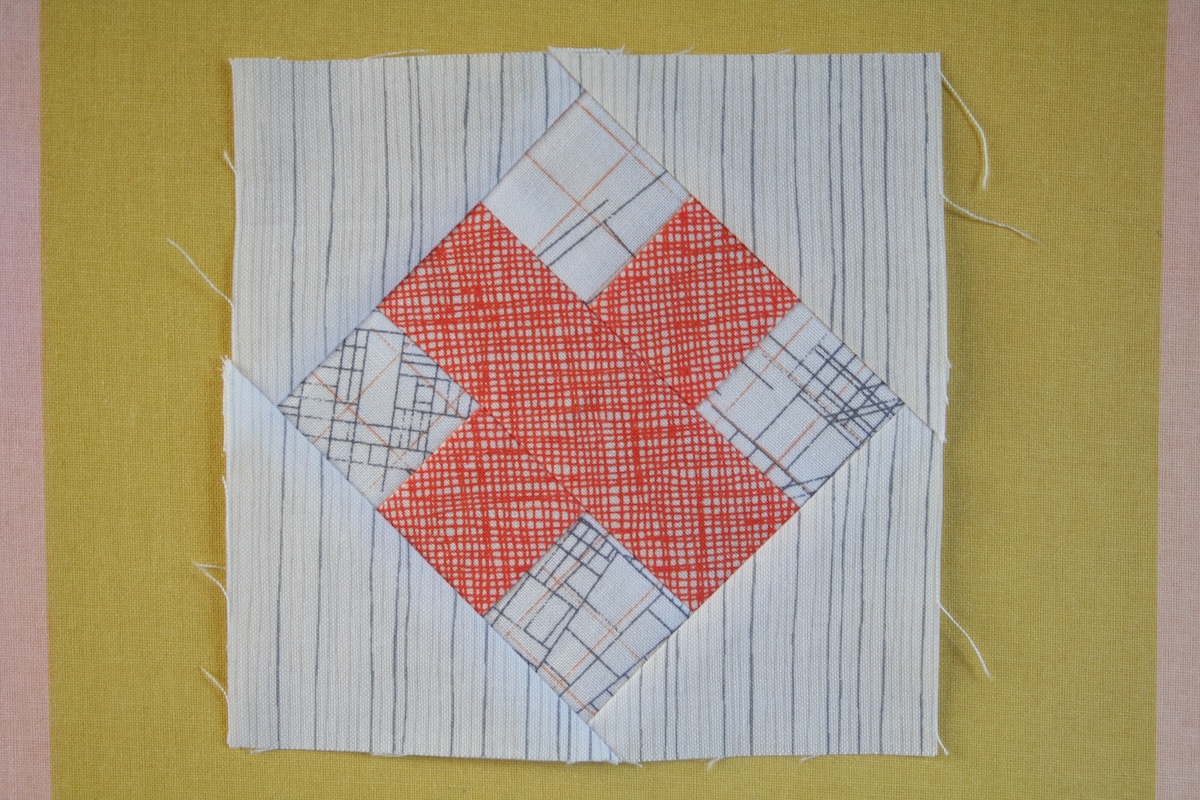
Trim the ears.
Your first block is finished…
Make a few more!
If you use this tutorial, I’d love to know, use the hashtags #raspberrykissblock and #woodenspoonquilts on instagram. Any questions, let me know too!
Cutting Instructions for an 8 1/2″ finished block
Centre Block cut ~
4 – 2 1/2″ background fabric squares
2 – 2 1/2″ cross fabric squares
1 – 6 1/2″x 2 1/2″ cross fabric rectangle
Corner Triangles cut ~
2 – 5 1/8″ squares, cut these in half diagonally to yield 4 triangles (if you prefer, cut these squares a little bigger and trim the finished block back)
Notes on resizing this block
Make the centre cross block to your desired size.
To determine the cutting size for the corner triangles I found this great calculator at Quilter’s Paradise for square in square blocks. In the column Select Starting Dimension select Inside Square Finished Length. Enter your centre block finished length measurement in the top drop down box and press Calculate.
The resulting Corner Square Side Length is the size to cut the two squares required for the corner triangles. If you prefer, you can cut these squares a little bigger than necessary, this will give you room to trim back.
This handy little calculator also gives you the size of your finished block!
As an example, if you base your centre cross block on 2 1/2″‘ squares, the centre block will finish at 6″. Enter 6″ as the Inside Square Finished Length. The calculator tells you to cut your corner squares to 5 1/8″ and the size of your finished block will be 8 1/2″.
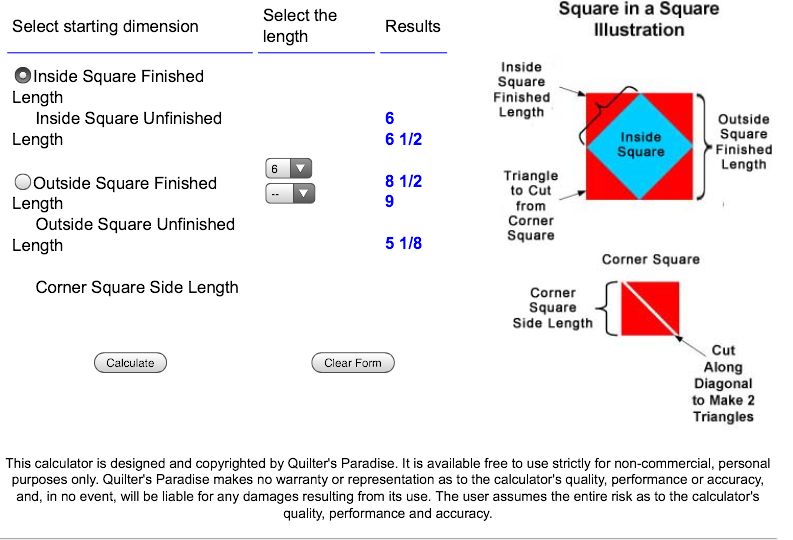
| Screenshot of the calculator at Quilter’s Paradise |
26 thoughts to “Raspberry Kiss Block Tutorial”
I had no idea you ad a blog! Where have I been? I remember asking you about having one so I could follow ( stalk ) you ; )
Can I buy your raspberry kiss pattern and the pdf format I do not have a printer so I would need a actual print out
great tutorial, thank you !
Love this pillow, thanks for the tutorial…
Thanks for sharing your tutorial…..amazing!!
You are so generous!! Thank you for a WONDERFUL tutorial! Such a versatile little block!
Oooo I love this! Thanks for sharing!
Very well written. Will add you to my Bloglovin list.
Awesome tutorial! Thanks
Thank you for this wonderful tutorial!!
This is an awesome block! Thanks for the pattern and tutorial! I love your fabrics!!
Susie
muito obrigada elo belo tutorial!!!
Thank you for the tutorial. It was so easy to follow. I made one of the larger size blocks the Quilt Block Boot Camp on FB. Your colors are so pretty!
Janie
I have just come across your lovely tutorial! I have been looking for a pattern for a Lecien Flower Sugar quilt and this will do perfect!! Thank you 🙂 xx
Hi Rachael…Loving this block here in Calgary, and your instructions are fabulous. Calgary Modern Quilt Guild is using it for our first block lotto!
Wonderful tutorial – thank you for sharing ?
Thank you for sharing this tutorial! I've pinned it! Visiting you from Oh Scrap at Quilting Is More Fun Than Housework!
Sorry, I saw this block on Quilting with Jannette and then found your tutorial! I've been looking for a tutorial for this block and here it is! Thank you! 🙂
Thank you for sharing this tutorial-I actually made a quilt for our Project Linus from this pattern and called it S.W.A.R.K. (Sealed With A Raspberry Kiss). I have a photo, so let me know if you'd like to see it! Thanks again!
What a brilliant set of instructions, particularly those for sizing up.
Pingback: Scrap Quilt Tutorials Round-up | Heritage Threads
I am making the raspberry kiss blocks to finish at 9 inches. When I started out, I found needed to cut the outside triangles 6 instead of 5 inches to give me leeway. Thought it would be easy to square them to size after sewing the block together. Now I am trying to square up my blocks to 9.5 inches unfinished, and I am at a loss how to do this. Can you help?
Is there a page with instructions/pictures to make 12” raspberry kiss block? I’d like to challenge some friends to make blocks for crafty cop. Thanks.
Pingback: Blöcke für die NewbieGermany – Handmade by Maritabw
Pingback: Bee.4.Bees #7 Raspberrykiss Block im Dezember – Augensterns Welt
How come all the pics are gone? This makes it difficult to follow…